Scan the WeChat code to contact us

Scan the WeChat code to contact us
Feel free to send us a massage and we will reply to you as soon as possible.
Creating the future with heart and soul

1.Technical characteristics and selection logic of hardness test methods
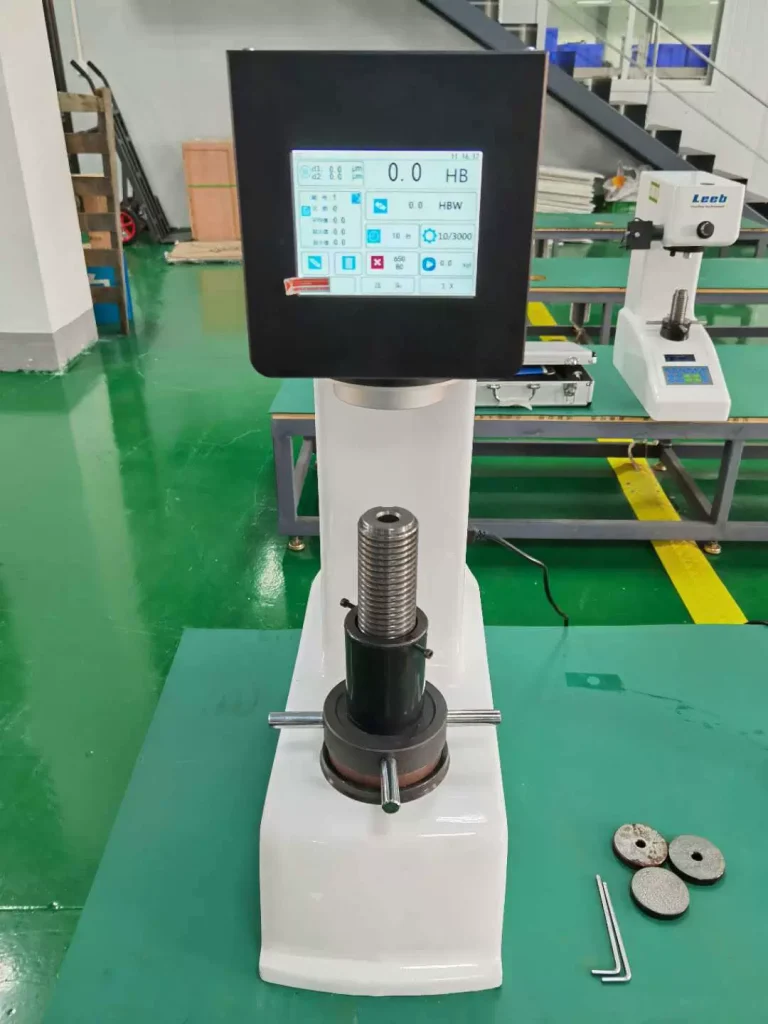
The hardness test of steel castings requires the establishment of a three-dimensional matching model of “method-material-scenario.” The core advantage of the Brinell hardness test (HB) is that it has a large indentation area, which can effectively average the hardness fluctuations caused by the uneven internal structure of the casting and is particularly suitable for evaluating casting blanks. Taking the wind turbine gearbox as an example, when using the HBW10/3000 parameter combination, the holding time must be strictly controlled at 12±1 seconds. Otherwise, the test result will produce a deviation of 3-5HB. Before testing, the test surface must be ground with silicon carbide sandpaper with a particle size of W40 to ensure that the surface roughness Ra≤1.6μm.

The Rockwell hardness test (HRC) shows high efficiency in the detection of finished parts, and its diamond indenter can accurately capture the characteristics of the surface hardened layer. Automotive parts manufacturers generally use the HR-150A test machine, equipped with an automatic turret device to achieve 6-point continuous detection, and the test cycle is compressed to 45 seconds/piece. It is worth noting that the test point spacing needs to be greater than 3 times the indentation diameter (about 0.8mm) to avoid the influence of stress field superposition. The test data of a gearbox gear shows that when the spacing is less than 0.6mm, the hardness value deviation of adjacent test points can reach HRC2.3.
Vickers hardness test (HV) shows a unique value in precision casting inspection. Its diamond indentation has a 40% higher detection accuracy for thin parts (thickness <3mm) than the Rockwell method. The case of aviation joint casting inspection shows that when the HV0.2 parameter is used, the standard deviation of the test results is controlled within ±15HV. In contrast, the standard deviation of the traditional HRC method is ±22HRC. Another advantage of this method is that it can be combined with metallographic analysis to judge the uniformity of the material by the indentation morphology.
2.Hardness grade system and performance coupling mechanism of steel castings
The hardness grade and material mechanical properties show nonlinear correlation characteristics. The hardness range of ordinary carbon steel castings (such as frame base) HB150-230 corresponds to a yield strength of 235-345MPa and an elongation δ≥18%. When the hardness exceeds HB250, the brittle transition temperature of the material increases significantly. The fracture toughness test of an engineering equipment manufacturer shows that the brittle transition temperature of HB280 castings is about 25°C higher than that of HB220 castings.
Alloy steel castings can reach HRC35-55 through the quenching process. At this time, the tensile strength of the material is increased to 800-1200MPa, but the impact absorption energy is reduced to 8-15J (standard specimen). The special needs of mining machinery crushing tooth plates have given rise to high-chromium cast iron materials, and their surface hardness above HRC60 is derived from the martensitic matrix and carbide strengthening phase. However, it should be noted that when the hardness exceeds HRC62, the residual stress inside the material may cause spontaneous cracks, and cracking during storage has occurred in actual cases.
Hardness gradient design has become a key technology for high-end castings. The automobile engine cylinder block adopts a surface laser quenching process to achieve a gradient structure of surface HRC55 (depth 0.8-1.2mm) and core HB200. This design increases the wear resistance of the friction surface of the cylinder block by 3 times while maintaining the feasibility of the overall casting process. The rail transit cast steel wheel hub adopts a uniform hardness design of HB300-350 to ensure that the performance of the welded joint matches the parent material.
3.Factors affecting detection accuracy and system optimization path
The influence of the microstructure of steel castings on hardness testing has multimodal characteristics. The distribution of flake graphite causes the hardness value to be anisotropic. The test data of a gray cast iron brake disc shows that the hardness along the graphite flake direction is HB15-20 lower than that in the vertical direction. For every 5% increase in pearlite content, the hardness value increases by HB8-12, but the impact toughness decreases by 10-15%. The influence of grain size follows the Hall-Petch relationship. When the grain size is refined from level 6 to level 8, the hardness value increases by HB10-15.
The control accuracy of heat treatment process parameters directly affects the hardness uniformity. The quenching medium temperature monitoring data shows that for every 10°C increase in water temperature, the surface hardness of the casting decreases by HRC1.8-2.5. The use of infrared thermometers in conjunction with PID control systems can control medium temperature fluctuations within ±2°C. The time-temperature integral (TTI) of the tempering process must be strictly controlled within the range of ±5%. A gear manufacturer has introduced a vacuum tempering furnace to improve the hardness uniformity from ±HRC4 to ±HRC1.5.
The optimization of the detection system requires the construction of a “man-machine-material-method-environment” collaborative model. Insufficient rigidity of the test bench may lead to indentation deformation errors. The use of a granite base can increase the rigidity of the test machine by 30%. In terms of environmental temperature and humidity control, the HB test result fluctuates by about ±3 for every 5°C change in temperature, and a 10% change in humidity causes the HRC test to fluctuate by ±1.5. A constant temperature and humidity test room (20±1°C, 50±5%RH) established by a precision casting company has reduced the test standard deviation from HB8 to HB4.

4. Practical cases of hardness control in typical industrial scenarios
Wind power gearbox castings adopt a “core tough surface hard” composite structure. The core is kept at HB280-320 to ensure welding performance, and the surface is hardened by high-frequency quenching to form a hardened layer of HRC58-62. A leading enterprise uses an ultrasonic hardness tester to detect the hardness gradient of every 0.1mm in the depth direction of the hardened layer, and the data feedback is used to optimize the power output of the quenching equipment. This process increases the contact fatigue life of the gear by 40%.
Rail transit bogie castings implement full-section hardness uniformity control. Through the automated Rockwell test system (equipped with a robot loading device), 100% detection coverage of key parts of the casting is achieved. After SPC analysis, the test data is used to adjust the design of the cooling water channel of the casting mold to increase the hardness uniformity from 78% to 92%. A high-speed rail project has, therefore, passed the EN 10293 certification and obtained EU market access.
Marine diesel engine crankshaft castings face extreme working conditions. The uniform hardness design of HB300-350 is adopted, and the casting structure is optimized with finite element analysis. During the inspection process, it was found that the hardness fluctuation at the transition fillet of the crank arm exceeded the standard. By adjusting the casting system to achieve sequential solidification, the standard deviation of the hardness in this area was reduced from HB12 to HB6. Fatigue test verification shows that the crankshaft life is increased by 25% after improvement.
5. Innovative application of digital technology in hardness testing
The deployment of intelligent testing systems promotes the transformation of quality control models. Portable hardness testers integrate IoT modules to upload test data to cloud databases in real-time. The digital twin platform established by a casting company can predict the hardness range by inputting chemical composition and casting process parameters, with a prediction accuracy of more than 90%. When the measured hardness deviates from the predicted range, the system automatically triggers the process adjustment instruction.
The integration of machine vision and hardness testing has spawned a new testing paradigm. A CCD camera captures the indentation morphology, and the hardness value is intelligently determined by combining a deep learning algorithm. The intelligent testing unit used by an automotive parts company can complete indentation recognition and hardness calculation within 0.5 seconds, which is 5 times faster than traditional manual readings and eliminates human errors.
Virtual reality technology enables testing skills training. The constructed 3D casting model can simulate the hardness test process of more than 200 defect scenarios, and operators can get an immersive learning experience through VR equipment. Training data of a foundry company shows that after adopting VR teaching, the qualified period of inspection personnel is shortened by 60% and the operation standardization is improved by 85%.